Showing posts with label Provident Hands. Show all posts

Wednesday, July 17, 2013

Fabric and Craft Storage


I was thinking and thinking and thinking...how to store my fabric. I don't have a lot, but what I do have I wanted very easy access to. You know flat folding in piles gets messy and can be difficult to pull, say the bottom piece out. So this plan works beautifully for me. The flat fold on the top left shelf is larger home decor fabric, and that worked better folded and storing flat, but it still works because there are just a few pieces. 

I moved my antique baby scale from the craft table to the shelf and I like it here. Well, I will be working on organizing the rest of these shelves until they work just right for me.
It is such a treat to be in this little room. With the pretty colors of fabric cheerfully displayed. Creativity is such a blessing. :)

Craft Room Shelving...The quest for all things organized!


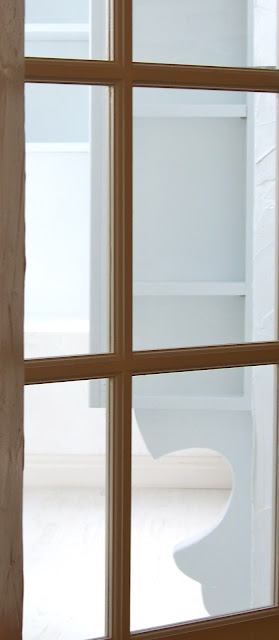
After a long time I finally have my shelving installed. I designed how I wanted it to look and it came out fairly close to what I had envisioned. Here it is from the doorway looking in, actually the paint on the door is white (a darker white), I'm not sure why it is looking like a wood tone.


My husband had to take this view with his "power camera" with the wide angle lens to get it all in. You can see the smoke detector hanging from the ceiling. He had to cut through the ceiling and move it over so when the unit was installed it would clear the detector. There is more work to be done. The ceiling has to be painted where it was cut in to, and the detector put back in place. The molding still needs to be painted and of course the sewing and craft supplies will need to be organized on the shelves. At the bottom is just the sunshine hitting the wall below the last shelves.

I love the corbels, they came pretty close to making them how I wanted, except the top portion was  suppose to be as deep as the shelf depths, (which are 2 different sizes). Oh well--what to do?

Friday, October 19, 2012

STENCILS and QUOTES

A Little quote that I love...


I wanted to use Celtic lettering from the book of Kells Script for my quote, so I researched and ordered a book called "Celtic Art, the methods of construction" 

I enlarged the font I wanted and then with a light box I traced the letters on stock paper and I had very homemade, rough looking stencils.  I wanted it to be a little "off" I wasn't real particular about leveling etc.  I used my left over Venetian Plaster paint to paint on the words.  It bumps up off the wall a little and in person gives it a nice cozy feel.  Just what I was looking for.

For some reason the picture is showing a bluish hazy area around some of the words, which in actuality isn't there.  Hmmm...I need lessons in photography.

I'm happy with it and when the candles are lit, it feels like a storybook---just like I wanted:)

Tuesday, April 3, 2012

My Little Haven~My Little Craft Room


I now have my very own little craft room in the making. I've been slowly transforming the room. It used to be my oldest sons room who is now married and has recently had his own sweet baby. I am contemplating a name for my room...when the right name comes to me I will post it outside the door, either by a hanging sign or painted directly on the wall.
The pictures here are just of one small corner in the room.
My table top spans the length of the room which is about 9' 3". It was actually intended to be a wall panel (cherry wood) for The Conference Center years and years ago. The story that came to me was that it was a leftover and going to be thrown out. It was rescued by a man who worked there and given to a dear friend of mine who kept it housed for years. Her husband finally decided he would not budge its heftiness one more time and by a loving fluke I became the happy recipient.

I had a neighbor friend trim it down to fit the length of the room and also cut it down so it wasn't too deep. He did a beautiful job. Then I turned my attention to the problem of the recessed areas. That was easy, by just putting glass across the length of the top it became a useable surface. It makes it fun because it leaves room for little memento's underneath the glass.

Below you can see a ceramic hand print from when I was in kindergarten and a bracelet that I received as a Christmas Gift when I was 6 years old. The compartment on the bracelet holds a total of 5 dimes. Wow~did I think I was cool or what! :) The chain that you see didn't originate with it, that was long broke and gone. This one is just sitting there until I can get a better one to have attached to the charm.


There are a few more memento's sprinkled down the table top for now, but nothing is in its permanent place yet. The room is still not fully functional but its slowly moving in that direction. YEAH!!! :)




Thursday, June 2, 2011

Whimsical Pride and Prejudice Doll

Meet my new doll.
I've named her Annie Lou Lou, after my sister (that was my sister's nick name growing up).


I began making her at my sister's home in Washington earlier this year. I had flown up to my sister's to finish a quilt I had been working on, and when I saw this doll in a book she had, called "Sew Sunny Homestyle" I just had to make it.

My sister graciously let me choose from her bountiful fabric bolts and stashes all kinds of prints for her wardrobe. It was fun picking out fabrics for her dresses and pajamas and swimsuit.

In fact the above picture shows her in her 1800's swimsuit. It actually isn't quite finished, the pattern shows it sewn to the doll. That wasn't going to work for me since I wanted to create a whole wardrobe for her. So I am working on making it removable and finishing up the embellishments of white trim and pearl buttons. I'm considering making her a headband for her hair also.


Resting on the couch.


Here is her first dress I made for her. I"ll be making many more, hopefully. I also began making a second doll and when she is all put together, I will call her Liddy Nore (which was part of my nick name growing up.)

By the way, have you read Pride and Prejudice? I love the book and have read it multiple times. There are alot of good lessons included throughout its pages.

Until next time....Happy crafting :)

Saturday, July 31, 2010

My Country Tis of Thee

I can hardly believe it's the last day of July. Summer is flying by~and with it the Celebration of Our Country on July 4th. To help us celebrate the 4th this year I made this banner. It's made out of my very favorite material, "felted wool". I already had my white wool felted, so I took some red and blue wool from my stash that I had collected and I "felted" it. Then I started cutting everything out and putting it together. I was running out of time to get it completed by the 4th so my dear husband joined in and helped me make the pendants. And then he hung it up for me.

I love working with felted wool it feels "meaty" as if your working with something substantial and not wimpy. And when layered it looks even better. It turned out just as I had hoped. Except that I possibly should have made it a little larger.


Let us live in such a way so that, "God Can Bless America"!

And now on to August :)

Monday, March 1, 2010

Felted Wool Embroidery Keeper


I have recently finished my "Embroidery Keeper". I love it. Now I have most of my "tools" all in one place, ready to pick up and embroidery whatever project I'm working on. It was also the second time I had ever "felted my own wool". It was a fun project.


And here it is opened to reveal all the little compartments. The pocket on the far left is to hold the embroidery floss. In the middle portion is a pocket to hold the scissors, a pocket to hold a pen or pencil for any tracing that's needed and then there is a pin cushion. On the far right is a removable needle keeper and the heart below has two little pocket areas to hold incidentals. Here I have some buttons in it.

In this picture I've opened the needle keeper so you could see inside.

And here I've taken the scissors out to show that I added a plastic covering to the bottom of the scissors because it kept snagging on the wool as I would put it back in the pocket. Finally I decided to take the covering off of a pair of tweezers and put it on the bottom of my scissors and it worked perfectly. No more catching on the fabric. I bought the pattern from Crab Apple Hills Studio, I really had fun working on it. I am also making one for my sister with a pink wool inside lining. I can't wait to finish it so I can send it to her. We are both working on a quilt from Crab Apple Hills and it has alot of embroidering on it. It seems that embroidery is making a come back...:) So try it, you'll like it.

Monday, November 9, 2009

Knitting! I think I can, I think I can.

Fun! Fun! Fun!
I came across this pattern on Martha Stewart's site. I loved it instantly and wanted to try it for myself. So I dug right in and with help from a knitting book and many questions typed into Google (ex: How do I cast on? How do I knit? How do I Pearl or Purl ?(I've seen it spelled both ways? How do I increase???... and on and on ) I was on my way. About 15 or 16 hours later (I saw one site where a woman had made it in 3 hours) I am the proud owner of a neck scarf. I'm sure, now that I know how to knit a little I will be able to make the next one much faster?
Happy Knitting:0)

Wednesday, October 21, 2009

Scrapbooking

Wow!!! I was on "blog-rest" for a long time~
I really did have all kinds of fun things to share, but excuse #1 my son Morgyman borrowed my camera for a ten day trip back east in June and somehow I just didn't pick it up again until now.
Partly because the SD card was completely filled and we never got around to transferring the pictures. So now I have a new SD card all to myself.

Sooooo, I thought I would share a little craft I did last night for scrapbooking. It has many, many flaws. With practice I will get better~and with the right tools. I got this idea off of Martha Stewart. I love it, the picture is clip art that my sister Angela had sent to me years ago. I just slipped it in for now. When I make my next one I will of course have a family members picture in the frame and then it will go into one of my scrapbooks.

P.S. Don't you love the dragonfly brads? I sure do:)

~A thing of beauty is a Joy Forever~

I find that the happiest days are creative days:~)

Tuesday, June 16, 2009

Shakespeare, To Ruff Or Not To Ruff---That Is The Question...


Here is our loyal family dog Indy, modeling a Shakespearean Ruff collar that I made.
Do you really think he was sitting there so nicely for the picture--no way!

What you don't see is that I am holding up a piece of chicken lunch meat above the camera to help encourage him to let me take the picture. He was so excited to get the meat that he kept doing flips and rollovers constantly, it really took some effort to calm him down and have him sit still.


It was really fun to make these, and here is a quick description of how it was accomplished.

1. I first measured Tony's and then Morgy Man's and then Penny's, necks, and added about 1 inch to that measurement or less.
2. I then used 4 inch wired ribbon (from my craft storage for Tony and Morgy). Penny bought the ribbon you see on Indy, from Michaels.
3. It took approximately 4 to 6 yards of ribbon per Ruff Collar.
4. I used a ruler to measure how wide I wanted each pleat (between 1 inch and 1 1/2 inches ).
5. I than pleated the whole length of ribbon .
6. I then took needle and thread and "sewed" through each pleat at the side that would be around the neck, to draw the ribbon tight to form a circle.
7. I then attached ribbon at each end opening, so it can be tied around the neck.
8. Voila!!! All done, what fun!!!

I have now made two of these in different ribbons. When I have made enough of them I will have a Shakespeare party and everyone attending will be encouraged to wear one.
I can't wait!!!

Bye for now`:~)

Sunday, April 19, 2009

Quilting...


I am happy to introduce you to my first ever quilt "Traveling Bunnies."
Aren't they adorable?
(These pictures do not do it justice.)

I can take very little credit for the finished product. And all the OOZZEE and AAWWH"S go to my sister Angela.

Angela sent me the fabric with this handy dandy chart that she put together to make it as easy as possible for me.


Even then, there were phone calls to her with questions like:
Q: Me,
How do I use the wonder Under?

A: Angela,
-Rough side of Wonder Under to wrong side of fabric.
-Iron on "Cotton setting" 5 to 6 seconds per area.
-"Warning"! Do not drag the iron across the fabric, pick it up and set it down on the fabric.
Etc. Etc. Etc.

After a few phone calls, (some loooong phone calls) and working on them for about a month I had my bunnies put together on their background fabric awaiting the journey to my sister's home. The day finally arrived and the Bunnies and I boarded the plane. When we got to her home my sister went to work--it was wonderful watching her weave her magic freehand style with her long arm quilting machine as I sat surrounded by colorful fabrics and beautiful quilts that she had created and displayed on the walls all around the room---soooo cozy!
I flew home a week later with my first quilt, ready to enjoy. It was my birthday present from her. Great present huh?

Here is a few close-ups of a couple of the bunnies.


The book we got the bunny template from is "Another nice mix" by Gerry Kimmel.
Its actually called "Walking Rabbit"

Until next time:-)